My 1976 Jeep CJ-5
Find me on JeepForum
Water Pump Installation
(Not so many pictures on this page since it's basically the reverse of the removal process. Nothing much new to see except my exciting orange paint...)
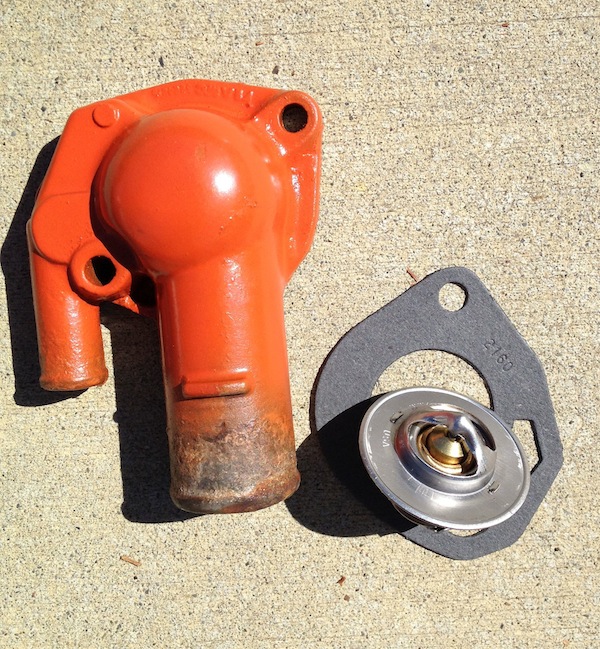
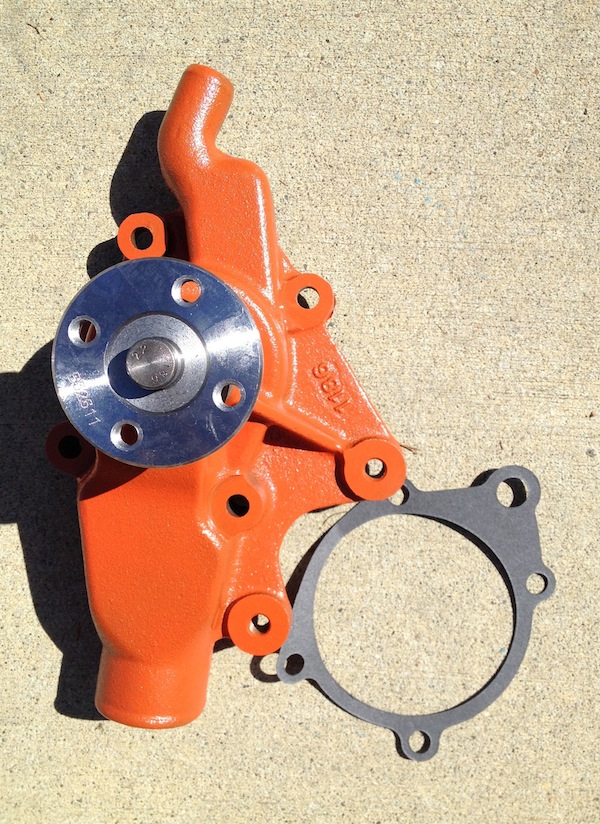
After waiting overnight for the new water pump to arrive I picked it up bright and early to begin the installation process. First order of business was to get a few coats of paint on the cleaned-up thermostat housing and on the new (not reman'd) pump. I used Chrysler Hemi-Orange thinking that would most closely match the color of my engine. Turns out it's a bit more red—maybe a Chevy red. Oh well, good enough until I rebuild it all and paint everything the proper AMC blue...
In painting the new pump I made sure to mask the impeller and gasket mating surface as well as the pulley wheel in the front. The pulley wheel isn't necessary to mask, I just thought it would look better. But the gasket mating surfaces must all be squeaky clean!
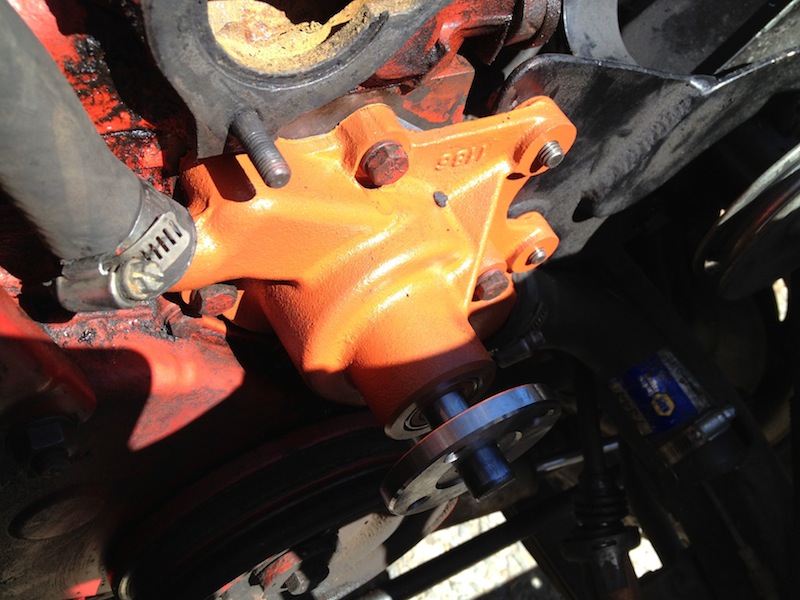
On to the actual installation after the paint dried for a few hours. The water pump is bolted down to 13 ft-lbs of torque. Not a huge amount by any means.
I attached the lower radiator hose at this point since it's easier to fool with before getting the fan back on. I didn't tighten the hose clamp though. Same deal with the heater core send line to the top of the water pump. Just easier without other stuff in the way since the angles are a bit cramped.
Also note the two bolts coming into the water pump from the back. These are two of the power steering mounting bracket bolts. Some brackets use these, some use tapped holes in the engine block. Mine also uses one on the exhaust manifold.
Next, on with the thermostat and housing—ensuring that the business end of the thermostat (the non-pointy end) is inside the engine. That's where the wax pellet is located. Same torque for the housing, 13 ft-lbs.
Once these are back in place it's time to slip the fan/alternator and power-steering belts back onto their pulleys. Nothing is tensioned yet, just sitting loosely in place. In fact, the fan/alternator belt can't be tensioned until the fan pulley is fitted onto the water pump.
And that's the next step. Mount the fan pulley, loop the belt loosely over it, and then mount the fan itself to the pulley. The same bolts are used to hold both so they come and go together. Torque 'em down to 18 ft-lbs.

After replacing the radiator and while reconnecting all of the hoses, I found that the top hose Napa has listed is a bit too long. No problem, I just used a razor knife and shortened it a bit. I filled the system with a 50/50 mix of water and anti-freeze. The 258 takes 10.5 quarts (including a quart for the heater core). That's just over 2.5 gallons.
You'll need to top up the radiator and fire up the engine to continue filling the system. Make sure you have the heater open all the way so you ensure fluid makes it all the way through the system. As the thermostat opens when the engine warms up you may have to top things up a bit (and you may have a bit of sudden overflow out of the radiator, be prepared for that and the bit of wet mess it makes—once the thermostat opens the level will drop and you'll want to add more water). Keep an eye on your temperature gauge to ensure nothing has gone wrong and you aren't over-heating.
Assuming all has gone well, and that you don't have any leaks from your gaskets or hoses, you are all set!
Update One Year Later...
A couple months ago I replaced my alternator (again). The previous alternator was a badly reman'd unit and it died relatively quickly. This time I installed a proper name-brand Delco unit. Much better. But—here's the catch—I was over-zealous in tensioning the belt. This quickly led to bearing failure in the water pump. This manifested itself with a very strange noise I had difficulty identifying. Didn't sound like the usual water pump failure noise. After removing all of the belts and running the engine—and re-attaching belts/devices one at a time—it became obvious it was the water pump making the noise. And when I tried wiggling the fan blade there was far too much play fore and aft. Bearings for sure. So, new water pump again! Having done it all just a year ago things went quickly. No rusted or stubborn bolts, old gasket cleaned up easily, etc. All apart and back together in about three hours (including running to the store for new anti-freeze and a new radiator cap).
Let this be a lesson to you—don't over-tension your belts!
Let this be a lesson to you—don't over-tension your belts!