My 1976 Jeep CJ-5
Find me on JeepForum
Hand-Throttle
A fun, easy project inspired by various other accounts out there was the installation of a hand-throttle to control engine speed independent of the gas pedal. This is a pretty old concept - a 1972 Fiat 124 Spyder I had in the early 80's had a hand-throttle in addition to the manual choke. And of course the various tractors my family had when I was young all had 'em. As others have noted, it's a handy device to have when one's foot is bouncing about too much to be steady on the accelerator and it's great when one is working outside the vehicle and one wishes to control engine speed (engine tuning, on-board air, welder, etc. - the reasons for it are many). I know, I've listed 'em off to my wife who just rolled her eyes as I described yet another change I was making...
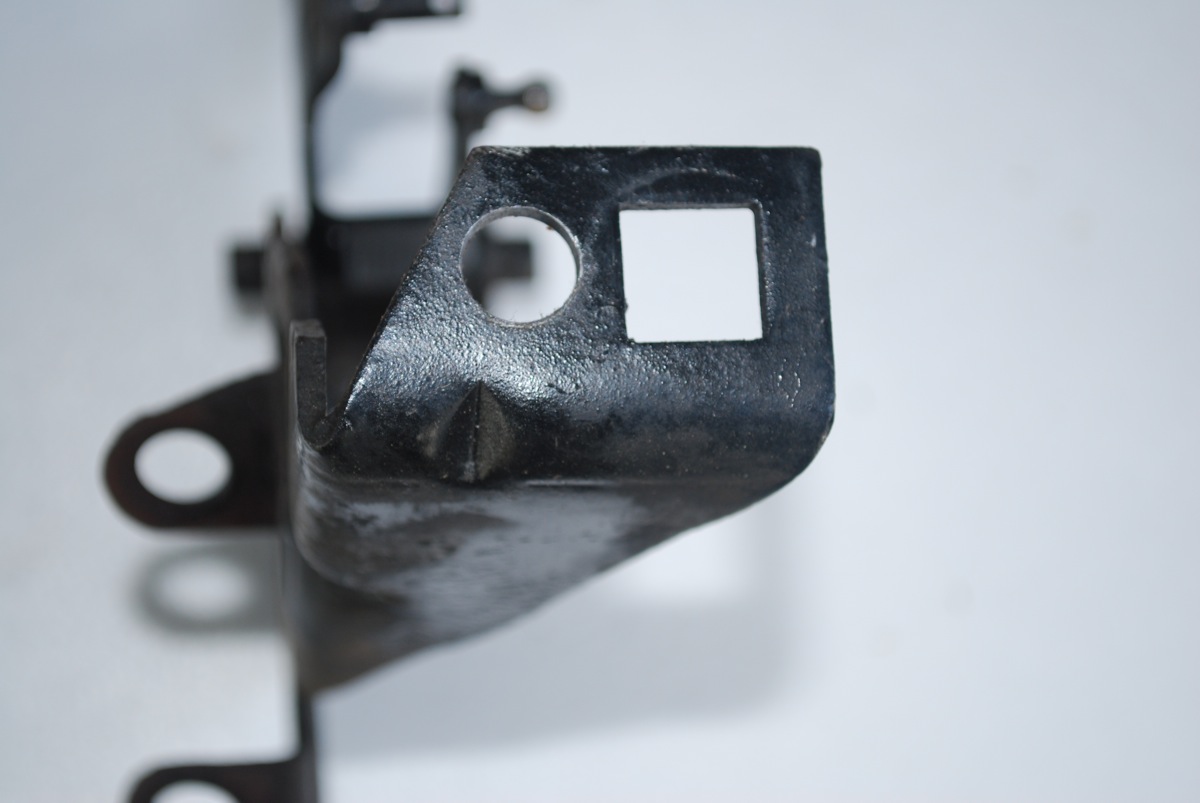
So, having browsed the various accounts online (my two favorites here and here) I determined to make my own setup. As folks at the JeepsOnly site note, most of the accounts out there treat the throttle linkage in a cursory fashion when it really is the most complex part of what is, overall, a pretty simple project. So I'll also try to focus on that aspect here. Note that I'm working on a CJ5 with the 258 engine and a Carter YF carb. About the most rudimentary of the post-1975 CJ setups.
A quick visit to the local bike shop garnered a friction (not an indexed!) shifter, age unknown - it had been sitting on their shelf for years, unsold; a length of cable, cable housing (about six feet for each), a few cable ferrules to crimp on the cable end and cable stops. Total spent: $16.
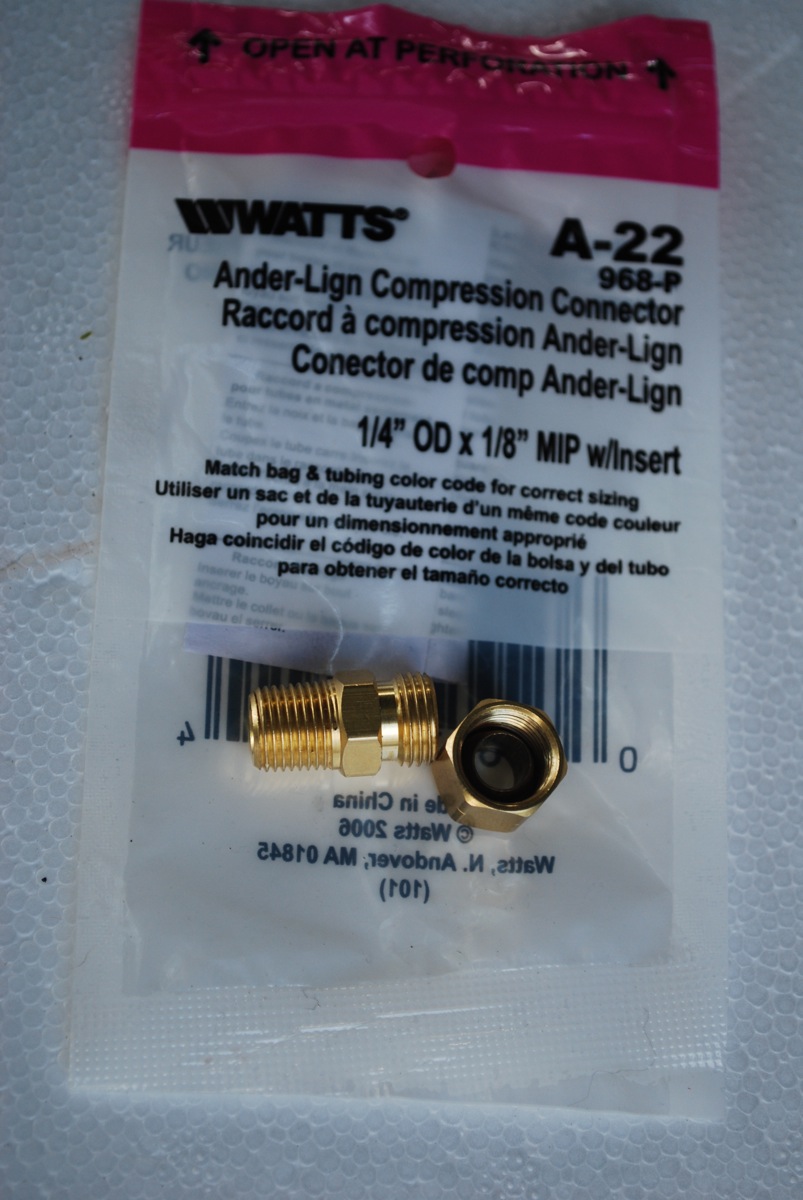
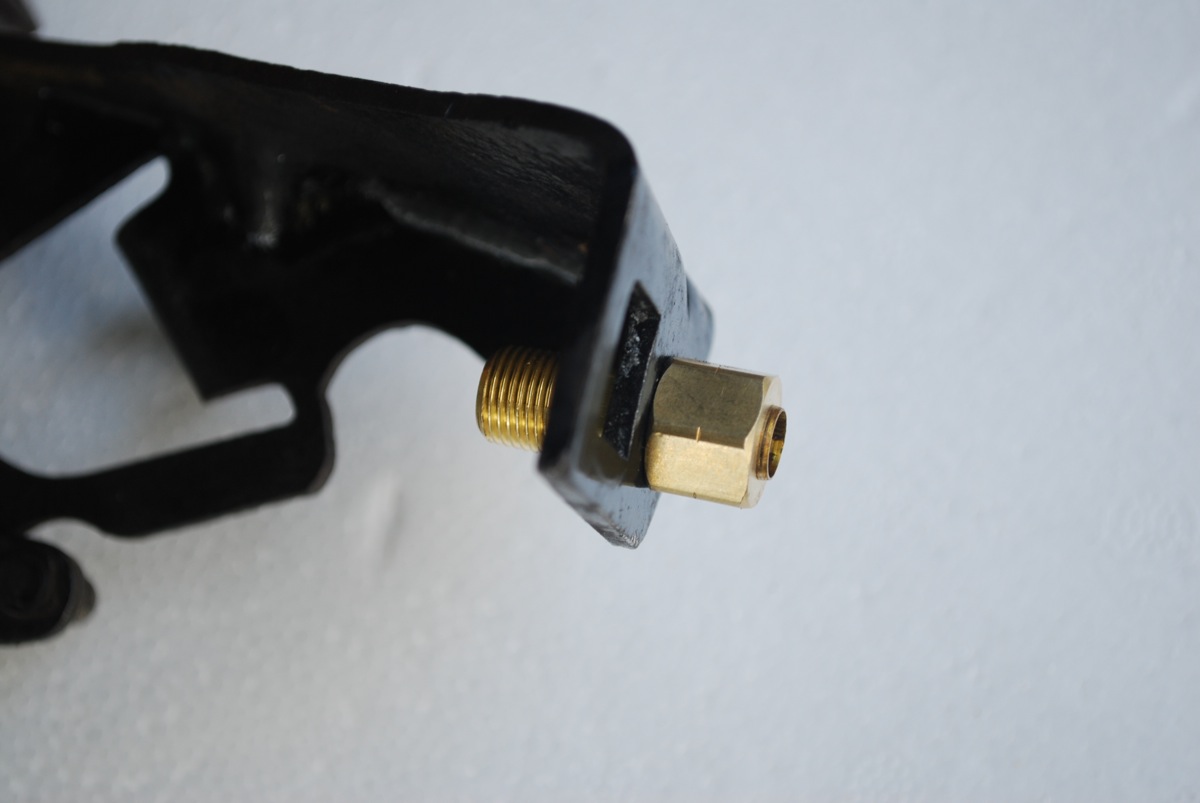
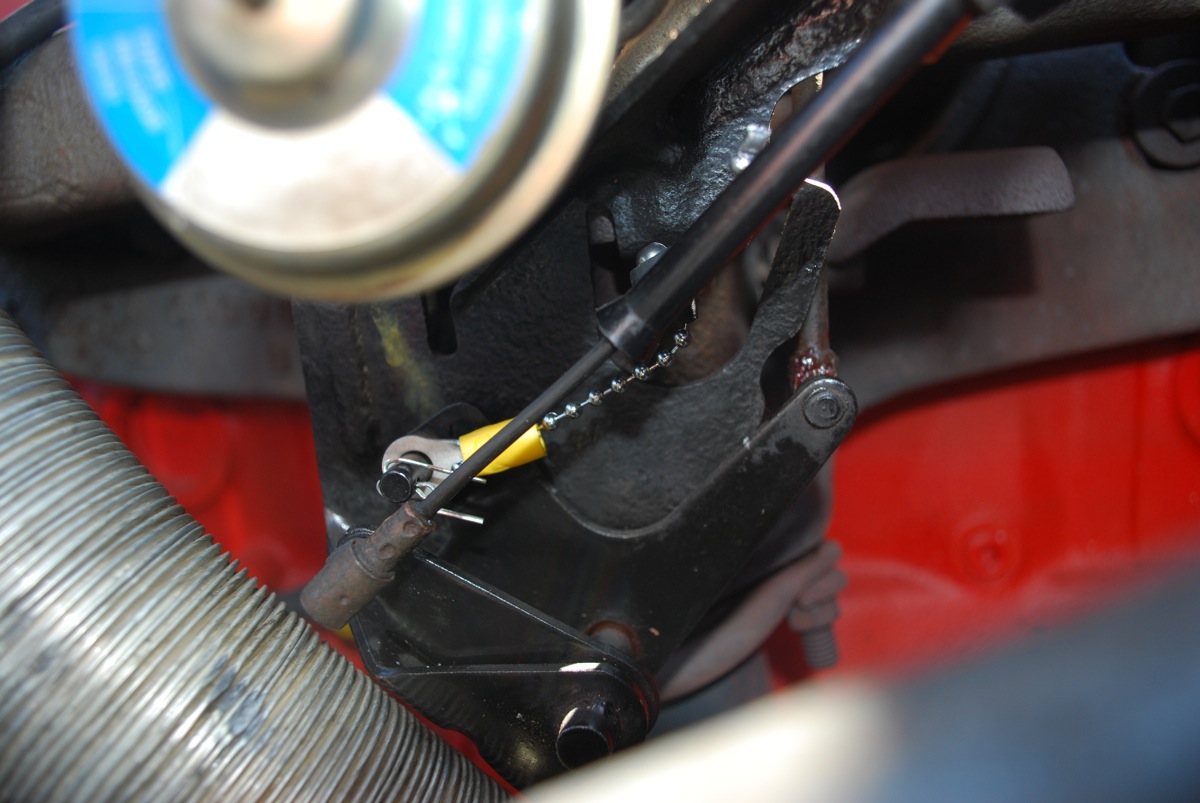
Ben Hollingsworth notes on his page that it is wise to use something like ball chain for the connection between the hand-throttle cable itself and the throttle linkage to allow for unimpeded function of the "real" throttle cable. A quick trip to the local hardware store adds a length of ball chain (of the toilet flapper-valve link variety) to the inventory. And just to make things pretty I also picked up a bit of brass plumbing kit to provide a nice termination point for the cable housing at the carb end of things. This is an Ander-Lign compression connector (1/4" OD x 1/8" MIP w/insert) - part number A-22 at HomeDepot. I suspect any well-stocked hardware or DIY store will have them or something similar.
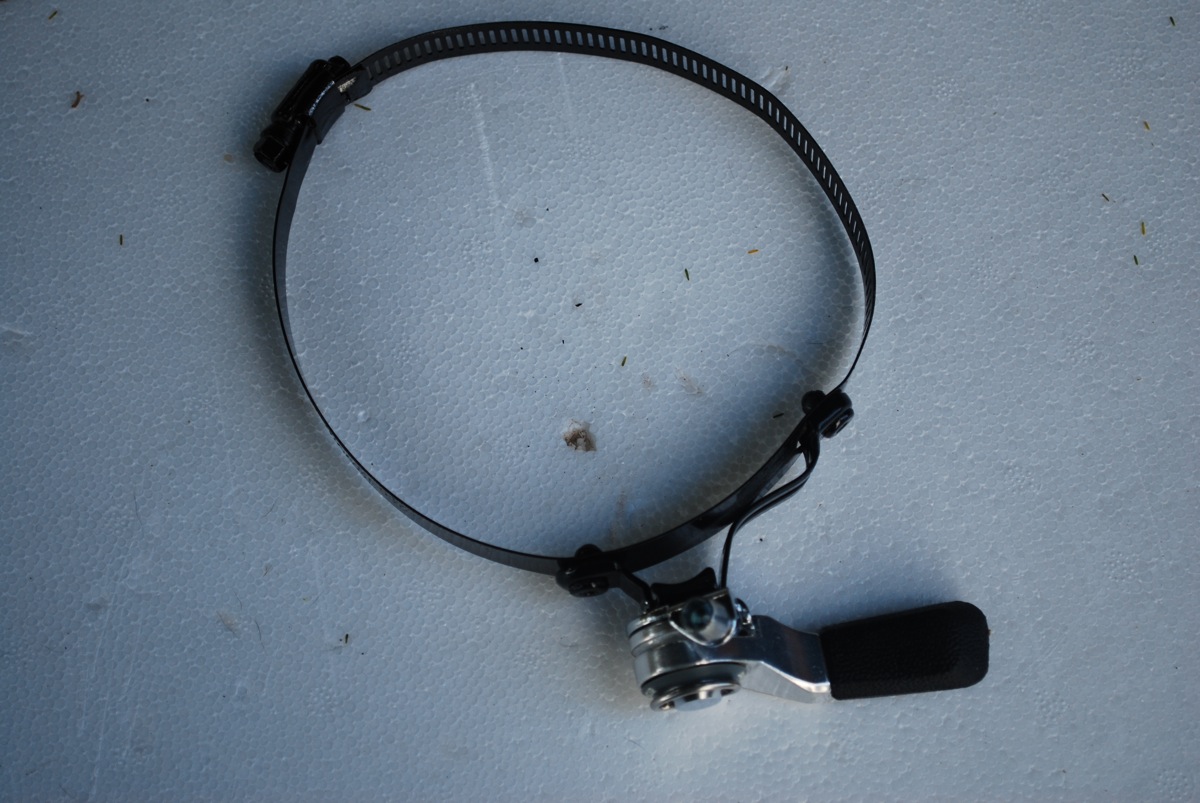
Having gathered all of the parts it was time for assembly. Unlike most of the other configurations I've seen out there, I opted to mount my throttle control on the steering column. Easier for me to reach either when driving or when standing next to the Jeep and reaching in. The shifter control is mounted to the steering column using a 3" diameter hose clamp to which I pop riveted the shifter mechanism and then painted most of the assembly black. From here the cable is routed down the steering column through the plastic dashboard fascia and then through a hole I drilled in the firewall immediately adjacent to the steering column. This provides for a fairly short, straight run for the cable as it makes its way to the throttle linkage under the hood.
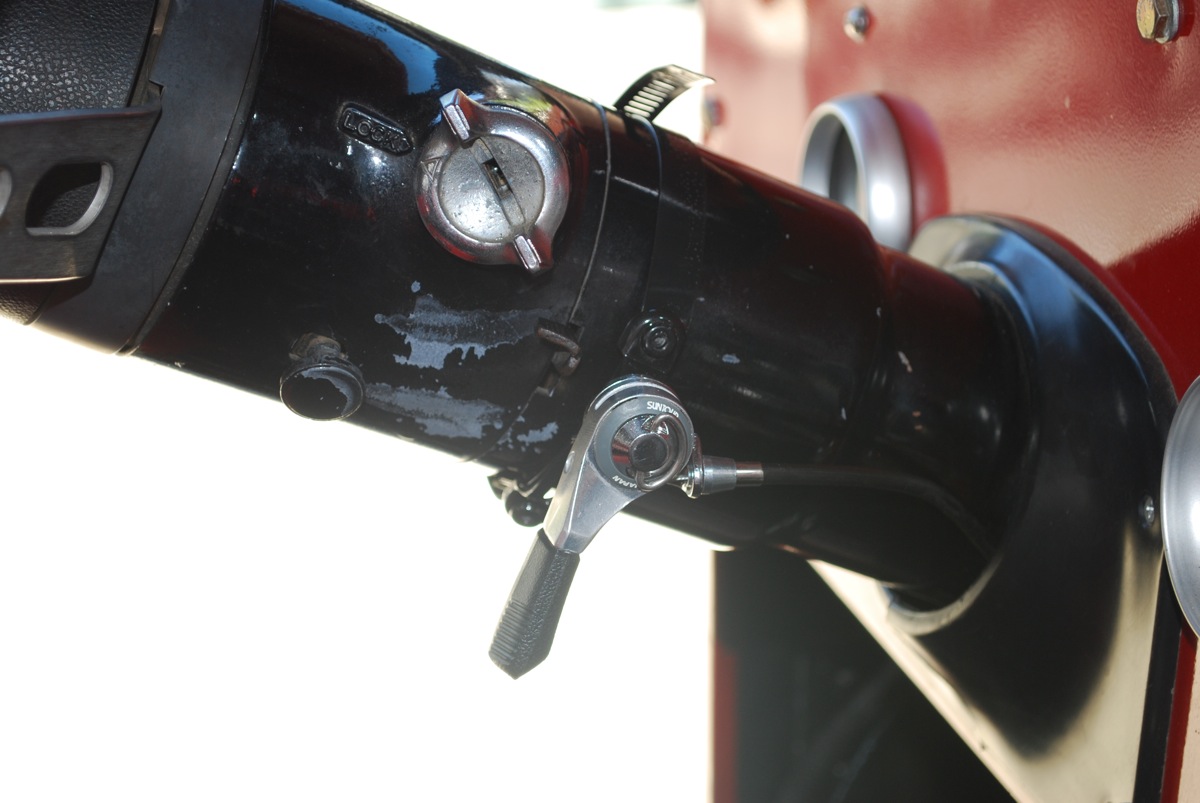
With the whole thing assembled I fired up the engine and gave the new throttle a try. A bit of extra slack in the chain meant I pulled the hand-throttle linkage a bit more than I'd expected before throttle response - but it does work! And with the limited scope of cable available I can only rev the engine to about 3,000 rpm which seems like a good safety limit to me. No need to go further and I won't accidentally do so.
Total time invested: about an hour of actual assembly work, a day of thinking about things, and ten minutes of back-and-forth getting tools I forgot the first trip to the garage.
Total amount invested: about $20.
Not too shabby...
Total time invested: about an hour of actual assembly work, a day of thinking about things, and ten minutes of back-and-forth getting tools I forgot the first trip to the garage.
Total amount invested: about $20.
Not too shabby...