My 1976 Jeep CJ-5
Find me on JeepForum
A New Stereo
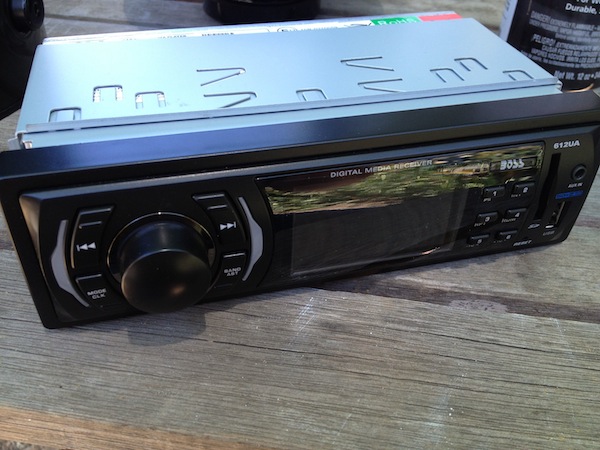
I don't have many CD's anymore, either. So I bought an AM/FM radio head unit with an auxiliary input for my iPhone (or any mp3 player). It's a cheap Boss system from Amazon that was only $30. Hardly high-end gear, but sufficient for the Jeep. To keep it from disappearing it is mounted in the DIN slot of my Tuffy center console. I left the old radio in place in the dashboard for looks.
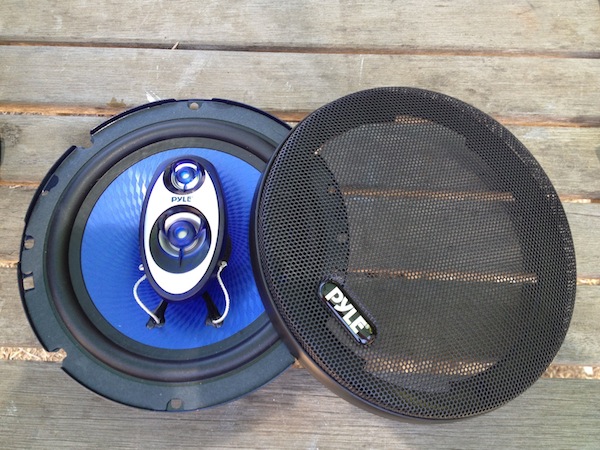
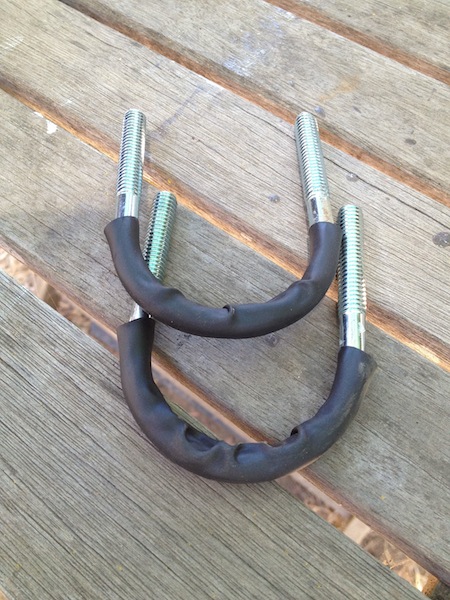
For the speakers, I was torn as to how I'd mount them. Under the seats worked okay, but not great—and I'd like to use that space for future projects. Boxes on the wheel wells in back seemed like a kludge. I didn't like it before and don't now. So I decided to build speaker enclosures I can mount to the rollbar via u-bolts.
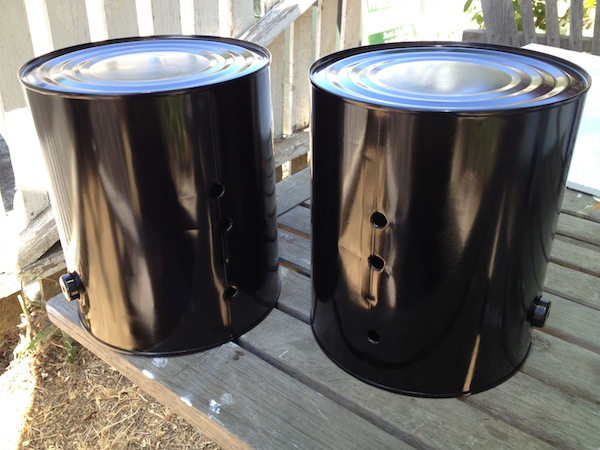
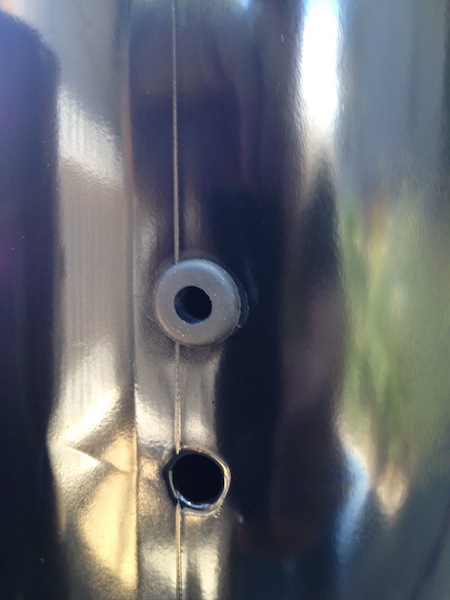
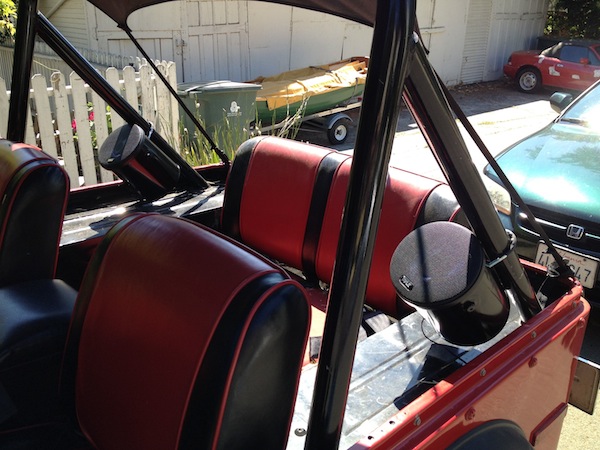
I drilled holes around the top lip of each can for the mounting screws (using a nail to create a small dimple to keep the drill bit from wandering on the sheet metal), two holes along the side into which the 2" u-bolt mounts, and a single hole a bit further back from the u-bolt mount for the speaker wires.
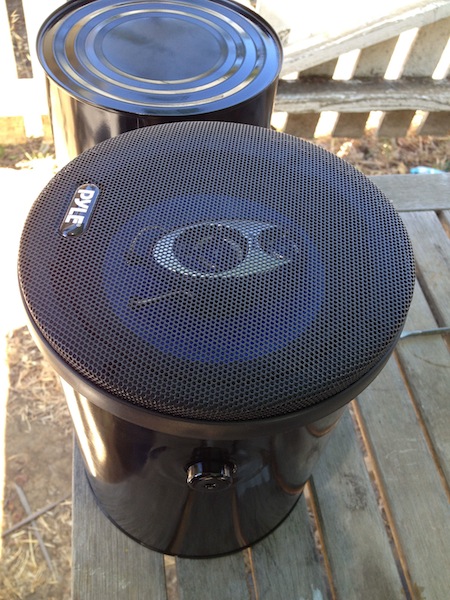
To help keep the speakers from slipping on the roll bar I lined each u-bolt with some left-over heat-shrink wire wrap from a previous project. Makes a nice, black cover too.
And to keep the bare edges of the hole in the metal through which the wires run from damaging said wires I used some 1/4" grommets.
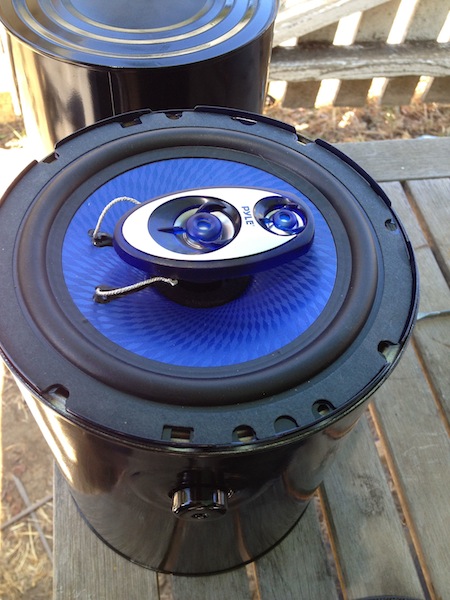
Speaker mounted, without protective grill in place.
Next, the speaker wire (enclosed in protective wire wrap) was fitted from the speakers (leaving plenty of wire inside to play with) around to the center console and the head unit itself.
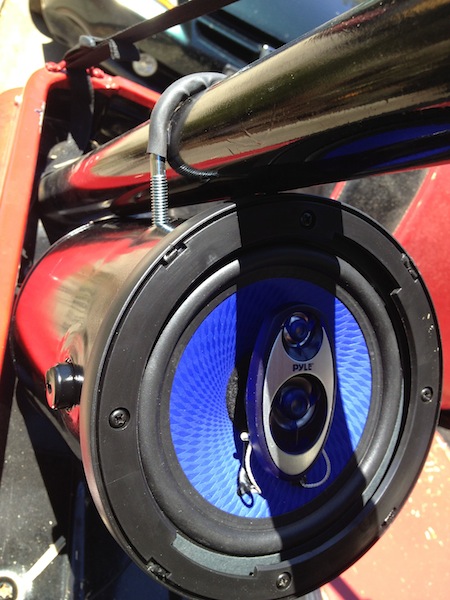
Finally, the speakers were connected to the wires and screwed into place in the enclosures. In doing this last bit I found that I had to fiddle a bit. With the enclosures bolted up tight to the roll bar I could install the speakers themselves but not the grills. These overlap the edge of the enclosure a bit and wouldn't fit. So I removed the speakers and loosened the u-bolts a bit and inserted some adhesive-backed rubber feet from some appliance I had sitting around. That provided enough room to tighten the bolts and still allow the grills to be installed. Phew!
Here's the final speaker setup.
If this ends up sounding good and seems to be durable enough to last I may start making these up as kits and selling them. I think they look kinda cool. I call 'em my "music mortars"...