My 1976 Jeep CJ-5
Find me on JeepForum
U-Joints
Over the past several weeks I'd noticed an increasing vibration as I drove. It would start at about 30mph and then seemed to fade away as I went faster. However, over time it stopped fading away and became even more noticeable the faster I went. And, it started to happen at slower speeds too. Furthermore, the vibration would go away the second I lifted my foot off the gas to coast, or shifted into neutral. It wasn't at all related to engine speed.
A quick query amongst the JeepForum crew offered the consensus view that this was a classic sign of failing u-joints.
So, on a nice sunny Saturday afternoon in March (there are some benefits of living in California) I crawled under the Jeep and dropped the rear drive shaft. This is easily done with a 1/2" wrench (at least on mine). Takes about five minutes.

After a bit of encouragement with a hammer I had the joint out. Note: it makes things *much* easier if one remembers to remove the retaining clip on the other end of the yoke before removal begins...
Also, if your joints have zerks for greasing, remove them now.
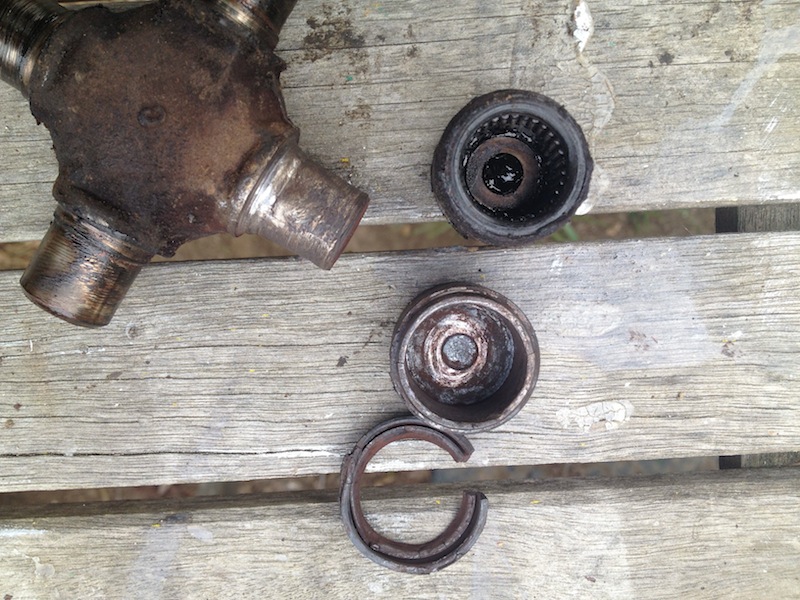
Into the garbage the old joints went. If one is going to replace the joint at one end of the shaft, might as well replace both. I used Spicer 1310's. Don't use cheap no-name u-joints, the savings isn't worth it when you have to replace them twice as often.
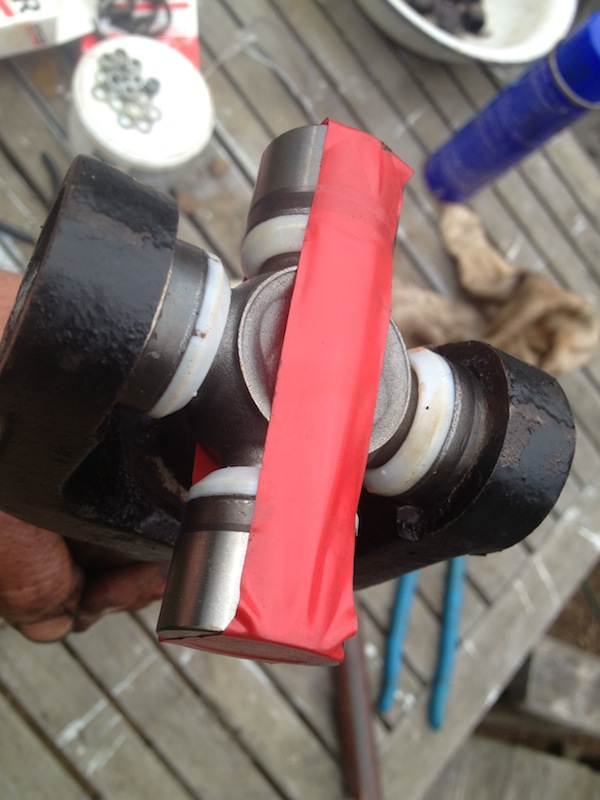
A helpful thing to do, as pictured here, is to wrap the other bearing caps with tape to prevent them from falling off at just the wrong time while crawling back under the vehicle.
Before reinstalling the shaft it is a good idea to clean the mating surfaces on the differential and transfer case yokes as well. Any crud in there may prevent the u-joint from firmly seating—and if it isn't firmly seated on one side you'll have more vibration when you drive than you ever experienced with a failing u-joint! Ask me how I know.
Torque things down and off you go! It's also a good idea to check those nuts a week or so later to make sure they've stayed put.
Final bit of advice: when you pull the drive shaft, be sure to either 1) not separate the two parts (i.e., slide the shorter end off the splined longer end); or 2) before you *do* separate them, mark them using paint, an awl, punch, something so that they go back together exactly as they were. You don't want them aligned with each other in any other way since the shaft was balanced as it currently is.